Glide4.6.1 源码心得
Glide是一款优秀的图片加载工具,使用起来也比较简单方便,为了更深入的学习,所以就去研究了一下glide的源码。
1、一般用法
Glide.with(Activity).load(URL).into(ImageView);
2、with方法
Glide中with方法一共有六个重载方法,传入值分别为:Context,Activity,FragmentActivity,app.Fragment,v4.Fragment,View类。

在with方法内部调用了get方法,这个方法是用于绑定Glide的生命周期。
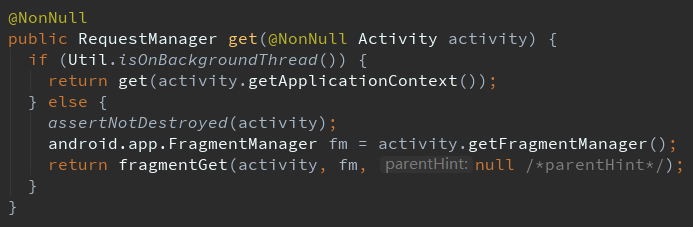
get方法内可以看到一个判断:是否在主线程,假如不是将Glide与APP的生命周期绑定在一起。而假如是在主线程,那么就会在activity中添加一个隐藏的fragment,用以判断activity的生命周期。
3、load方法
通过with方法后将会得到一个RequestManager类,在这个类中提供了load方法。load方法共有九个重载方法传入值分别为:Bitmap,Drawable,String,Uri,File,Integer,URL、byte[],Object类。通过这些方法已经可以将大多数我们想加载的图片类型加载出来了。

同时在RequestManager类中还提供了三个方法用于指定加载不同类型图片:asBitmap,asGif,asDrawable
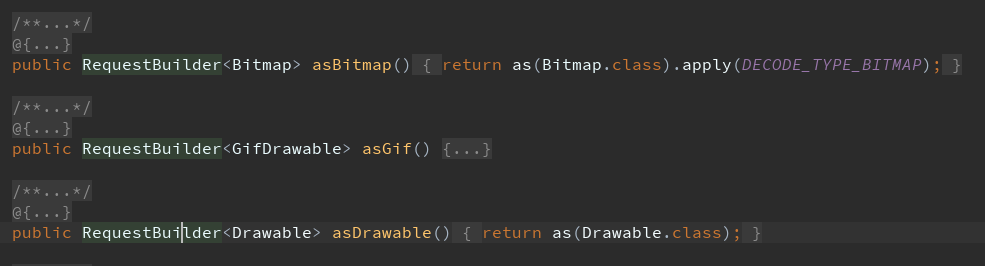
例:Glide.with(Activity).asGif().load(gifUrl).into(ImageView)
4、into方法
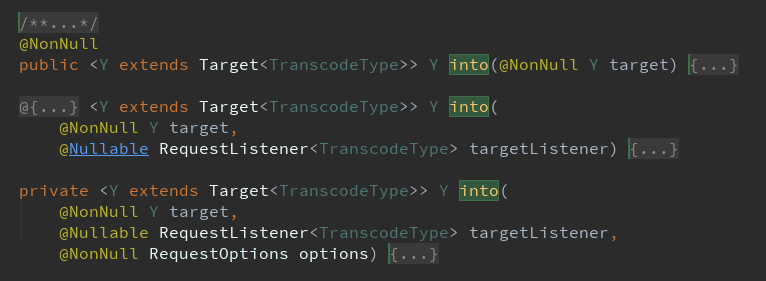
load方法后我们会得到一个RequestBuilder对象,在这个对象中我们可以通过into方法将图片加载到指定view上,同时ito方法也是提供了三个重载方法,分别是只传入view,传入view与listener,传入view、listener、option。
5、其它
1)图片圆角
首先需要一个图片处理的类
public  class CornersTransform extends BitmapTransformation {
    private float radius;

    public CornersTransform(Context context) {
        super(context);
        radius = 10;
    }

    public CornersTransform(Context context, float radius) {
        super(context);
        this.radius = radius;
    }

    @Override
    protected Bitmap transform(@NonNull BitmapPool pool, @NonNull Bitmap toTransform, int outWidth, int outHeight) {
        return cornersCrop(pool, toTransform);
    }

    private Bitmap cornersCrop(BitmapPool pool, Bitmap source) {
        if (source == null) return null;
        Bitmap result = Bitmap.createBitmap(source.getWidth(), source.getHeight(), Bitmap.Config.ARGB_8888);
        Canvas canvas = new Canvas(result);
        Paint paint  = new Paint();
        paint.setShader(new BitmapShader(source, BitmapShader.TileMode.CLAMP, BitmapShader.TileMode.CLAMP));
        paint.setAntiAlias(true);
        RectF rectF = new RectF(0f, 0f, source.getWidth(), source.getHeight());
        canvas.drawRoundRect(rectF, radius, radius, paint);
        return result;
    }

    public String getId() {
        return getClass().getName() + Math.round(radius);
    }

    @Override
    public void updateDiskCacheKey(@NonNull MessageDigest messageDigest) {

    }
}
然后在加载图片时使用
String url = "http://desk.fd.zol-img.com.cn/g5/M00/02/0F/ChMkJlbK7JeIFhACAArOl2v-eCMAALKjgJtPOEACs6v923.jpg";

RequestOptions options = new RequestOptions()
            .centerCrop()
            .transform(new CornersTransform(this,30));

Glide.with(this).load(url).apply(options).into(imageView);
效果:
这样处理后,无论是静态图片还是动态图片都能实现圆角。
小结
其实这篇博客对glide并没有研究的太深,真正有价值的不多,仅仅是我自己观看源码后一些心得。但是这只是我的第一篇博客,以后我会坚持写下去,质量也会提升的。
 wechat
 alipay